Getting Started
Sigma Connection Agent (SCA)
Sigma Connection Agent (SCA) is a lightweight proxy service installed on a PC to help Total Control (Windows) recognize and manage emulators, as well as devices connected via USB or TCP/IP.
Step 1: Download and Install
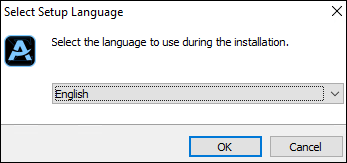
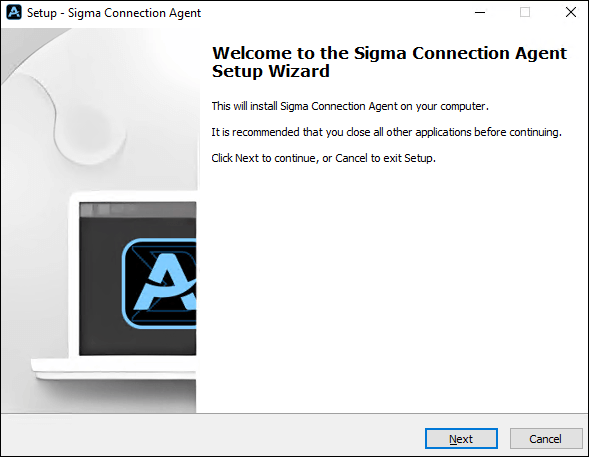
Please visit the official website to download Sigma Connection Agent (SCA), and follow the instructions to complete the installation on your PC.
After successful installation, launch SCA.
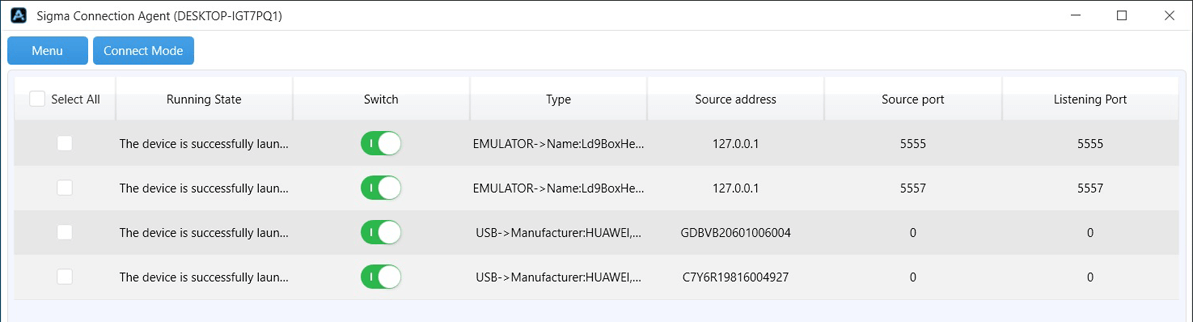
Main window of SCA:

Step 2: Connect Devices
SCA supports connecting to emulators, USB devices, and TCP/IP devices.
Connect Emulator Devices
It is recommended to install emulators on the same PC as SCA for easier recognition.
Before connecting, you need to configure the emulator.
After configuring the emulator, click the “Menu” button in the SCA main window to display the dropdown menu:
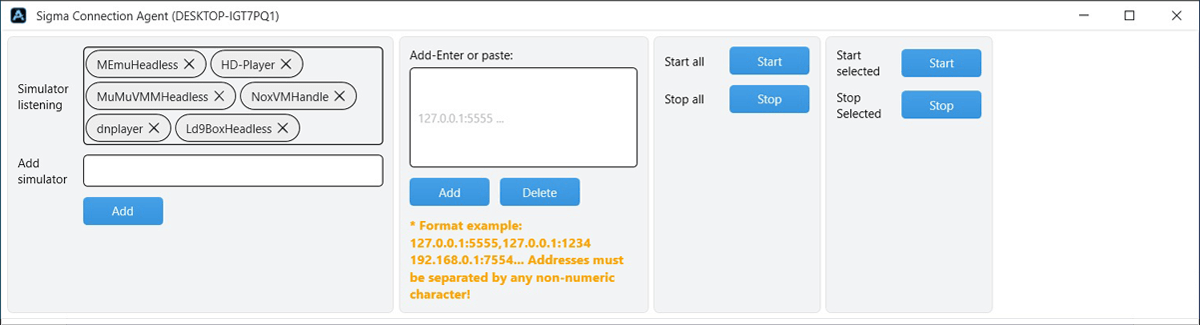
“Emulator Listening” lists the mainstream emulators supported by default. If you want to add a new emulator, enter its process name in “Add Emulator” (for example, LDPlayer’s process name is dnplayer), then click the “Add” button to include it in the emulator listening list.
If the supported emulator is installed on the same PC as SCA, it will be automatically recognized, and the devices in the emulator will appear in the device list.
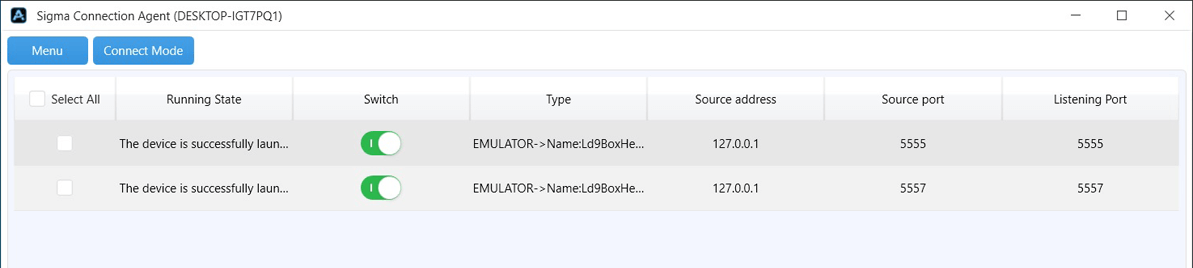
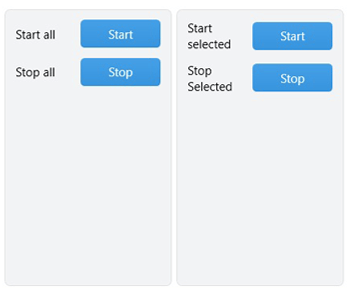
You can disconnect a device by toggling the switch in the list, or disconnect all/selected devices via the “Stop” option in the menu.
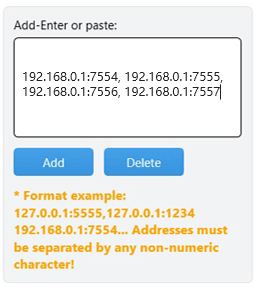
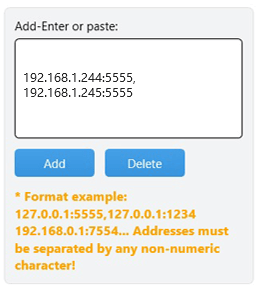
To connect to remote emulator devices, enter the emulator device IP address and port in “Add - Input or Paste” (Get Emulator IP Address). Multiple devices can be separated by commas, e.g., 192.168.0.1:7554, 192.168.0.1:7555, 192.168.0.1:7556, 192.168.0.1:7557... Then click “Add,” and the recognized devices will appear in the list.
Connect USB Devices
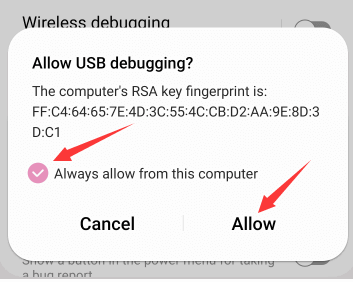
Enable “USB Debugging” on your device and connect it to SCA via a USB cable. The rest of the process will proceed automatically. When the following prompt appears on your device, check “Always allow from this computer” and click “OK.”
During the connection, SCA will automatically push the app to the device. The recognized device will appear in the list.
You can disconnect a device by toggling the switch in the list, or disconnect all/selected devices via the “Stop” option in the menu.
Connect TCP/IP Devices
First, connect the device to SCA once using a USB cable, then disconnect the USB.
Connect the device and SCA to the same network via Wi-Fi or LAN cable.
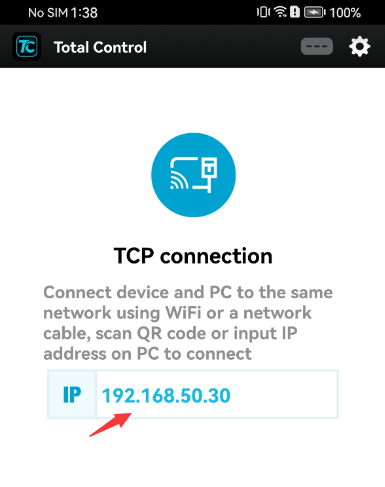
Open Total Control on the device, and the TCP connection section will display the device IP address.
In SCA, click the “Menu” button, and enter the device IP and port (usually 5555) in “Input or Paste.” For multiple devices, separate with commas, e.g., 192.168.50.30:5555, 192.168.50.29:5555. Then click “Add,” and the recognized devices will appear in the list.
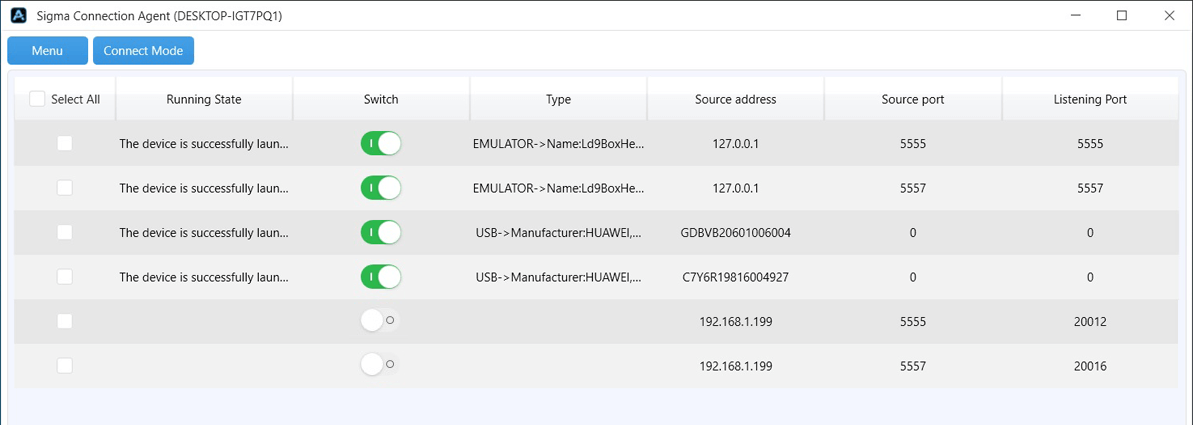
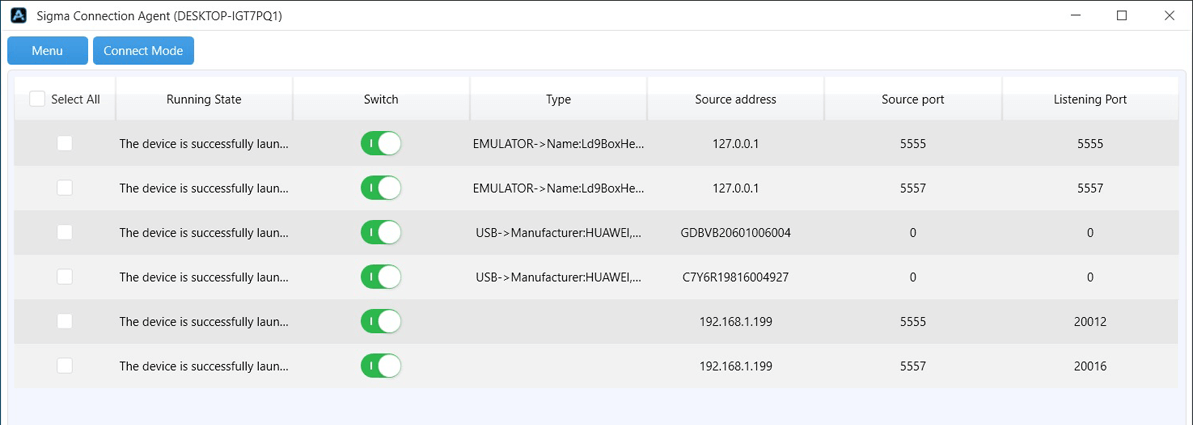
By default, network-connected devices are not connected. Toggle the switch in the list to connect, or click the “Start” option in the menu to connect all/selected devices.
Step 3: Connect Total Control to SCA Devices
To control devices in SCA, you need to connect via Total Control. Note that Total Control and SCA must be installed on different PCs.
Install Total Control on another PC and launch it.
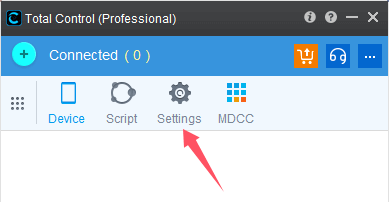
In the Total Control main window, click “System Settings.”
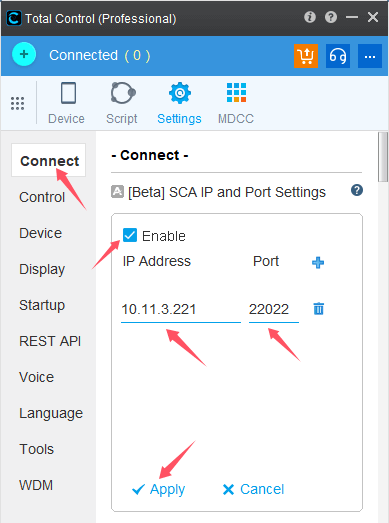
Under “Connection” - “SCA IP Address and Port Settings,” check “Enable,” enter the IP address of the PC running SCA, and port 22022 (22022 is the default SCA port), then click “Done.”
The connection window in Total Control will automatically display all devices connected to SCA. You can now control devices using Total Control.
Appendix 1: Configure LDPlayer
Step 1: Configure the Emulator
1. Launch the emulator.
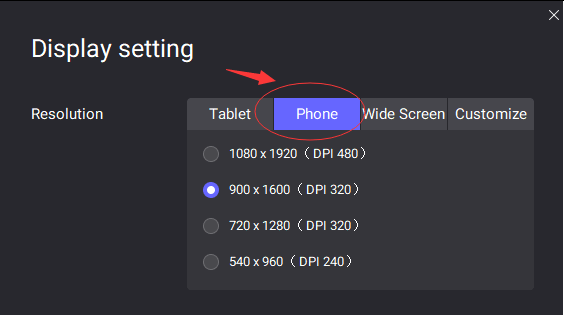
2. Click the menu in the top-right corner of the emulator window, go to settings, and select “Phone Mode” in the display settings.
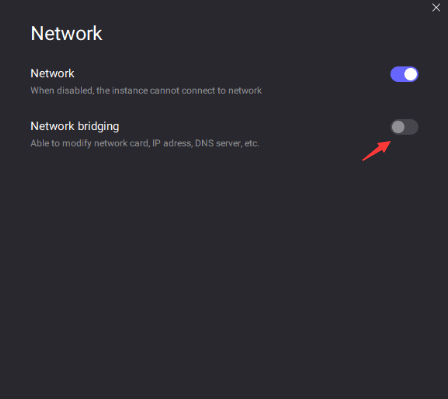
3. In “Network Settings”, make sure “Network Bridge Mode” is turned off, otherwise SCA will not connect.
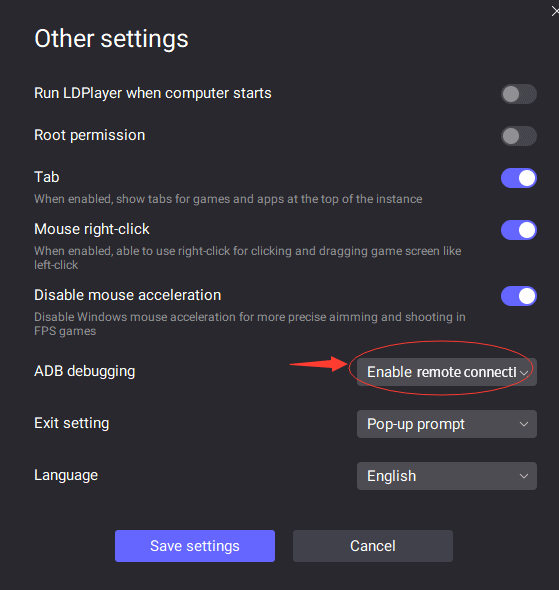
4. In “Other Settings” - “ADB Debugging,” select “Enable Local Connection.” After completing all settings, click “Save Settings” and restart the emulator.
Back
Appendix 2: Configure BlueStacks
Step 1: Configure the Emulator
1. Launch the emulator.
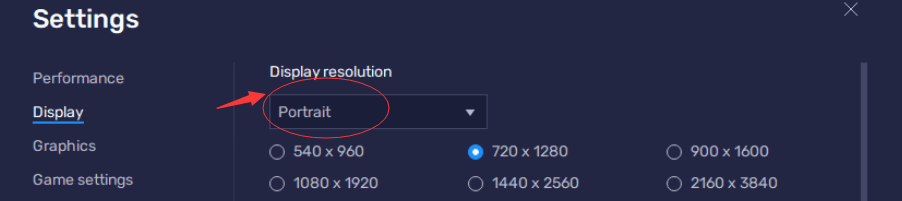
2. Click the menu in the top-right corner of the emulator window, go to settings, and under "Display" - "Display Resolution," select “Portrait.”
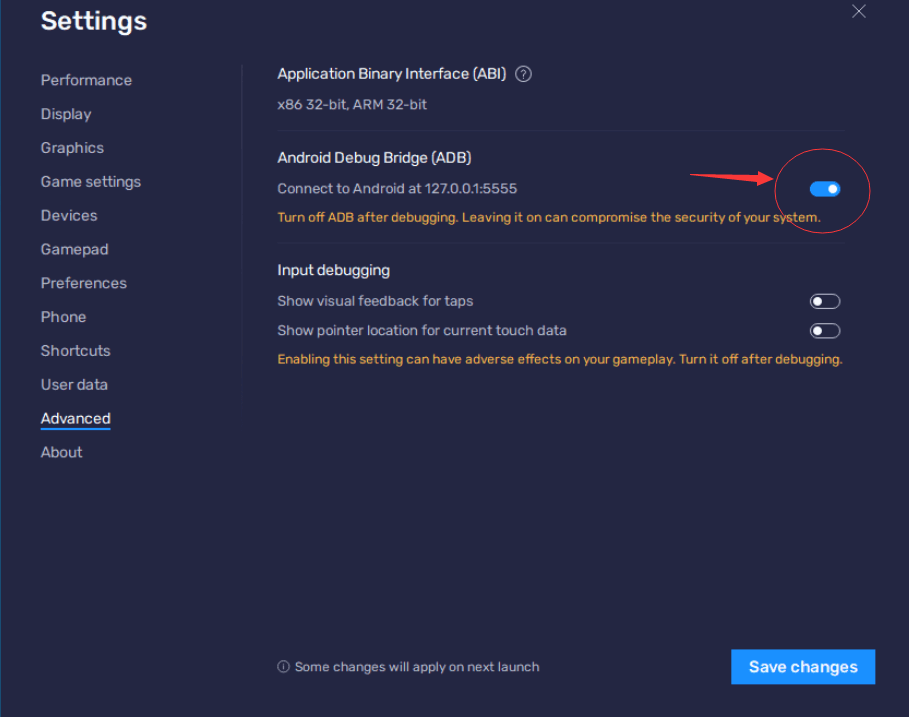
3. In “Advanced,” enable “Android Debugging (ADB).” After completing all settings, click “Save changes” and restart the emulator.
Appendix 3: Configure MuMuPlayer
Step 1: Configure the Emulator
1. Launch the emulator.
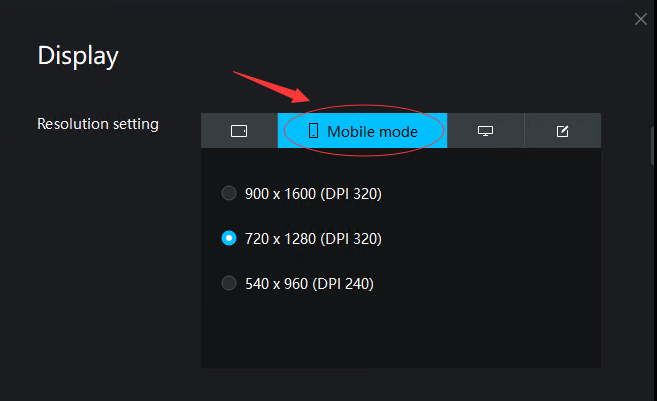
2. Click the menu in the top-right corner of the emulator window, go to settings, and under “Display” - “Resolution setting,” select “Mobile mode.”
3. In “Network Settings” - “Network Mode,” make sure “Network Bridge Mode” is turned off, otherwise SCA will not connect.
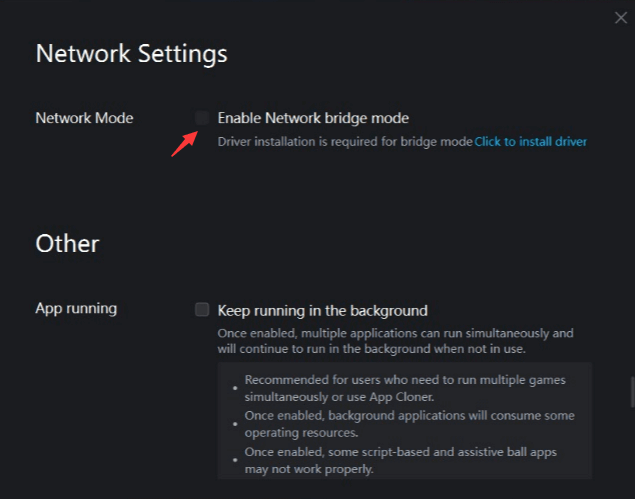
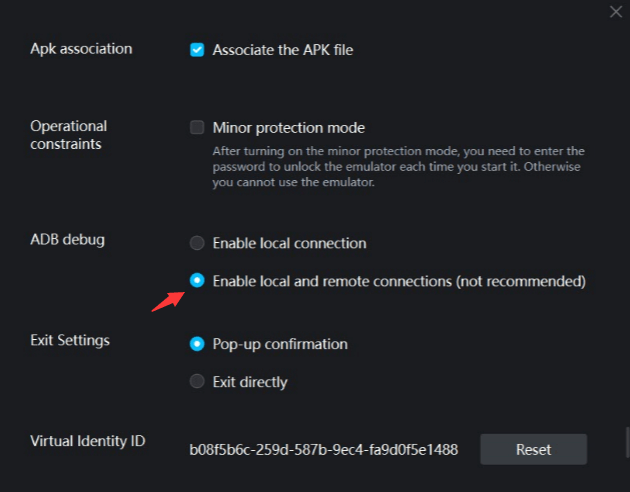
4. In “Other Settings” - “ADB debug”, select “Enable local and remote connections” After completing all settings, click “Save Settings” and restart the emulator.
Appendix 4: Get Emulator IP Address
For emulators that support network access, you can connect using their IP address.
💡 Note: Emulators without network access do not have the “Network Settings” option. In such cases, ensure the emulator and Total Control are installed on the same PC and use the local address 127.0.0.1 to access it.
Here is an example of how to obtain the IP address in “LDPlayer” (other emulators are similar):
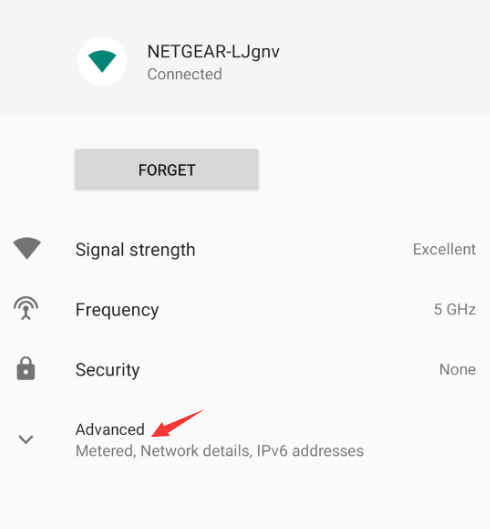
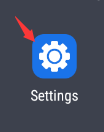
1. On the emulator desktop, click “Settings.”
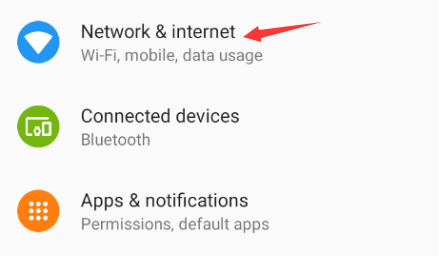
2. Go to “Network & Internet.”
3. Select “WLAN.”

4. Click the connected network name.
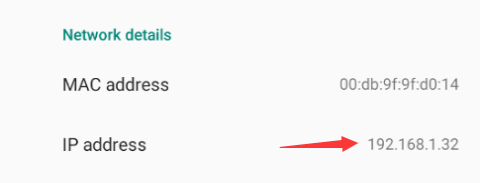
5. Go to “Advanced” settings to find the “IP Address.”