Test Execution
Test Execution
The XML-based testing framework is designed to facilitate comprehensive testing across multiple applications or distinct sections of a single application. It leverages a structured approach to define test suites, harnesses, and dependencies, allowing for a high degree of modularity and reusability. By employing the FindNode and assert mechanisms under stest framework, the framework focuses on locating specific elements within the application and validating their properties or behaviors, ensuring that each component functions as expected.
Structure and Components
Test Harness
The Test Harness acts as the top-level container for organizing test execution. It can reference both Test Suite files and other Test Harness files, allowing for a hierarchical organization of tests. This structure enables testers to group tests logically and execute them at varying levels of granularity, depending on the scope and requirements of the testing phase.
- TestSuiteFile: Points to an external XML file containing the definition of a Test Suite, which includes a collection of test scripts designed to target specific features or functionalities of the application.
- TestHarnessFile: References another Test Harness XML file, enabling the nesting of test environments. This feature allows for the creation of complex testing scenarios where higher-level harnesses control the execution of more specialized sub-harnesses and test suites.
Every app must have at least one harness file that includes one or more suite files.
Test Suite
Each Test Suite XML file encapsulates a series of test scripts, each defined with unique identifiers and optional dependencies. The suite includes detailed configurations such as the start date, time, iterations, and a Test Run specification to selectively execute tests.
- TestScripts: Defines the individual tests to be run as part of the suite, with each script including a path to the test code and a unique prefix. This ensures tests are executed in the correct order, maintaining the integrity of the testing environment.
- TestRun: An optional element that allows testers to specify exactly which tests should be executed within the suite. Test IDs can be listed individually or in ranges, providing flexibility in test execution.
FindNode and assert
The core of the testing framework lies in its use of FindNode and assert functions within each test script. FindNode is responsible for locating specific elements within the application under test, using identifiers like names, IDs, or other attributes. Once an element is found, assert statements are used to verify its properties, such as text content, color, visibility, or other relevant attributes. This methodical approach ensures that each element not only exists but also behaves as expected, providing a robust mechanism for validating the functionality of complex applications. Assert fail means fail otherwise it is a pass.
Conclusion
This XML-based testing framework offers a powerful and flexible solution for managing extensive testing activities across multiple applications or various sections of a single app. Its hierarchical structure, combined with the precision of FindNode and assert functions, provides a comprehensive toolset for ensuring application quality and reliability. By centralizing test definitions and configurations within XML files, the framework facilitates easy maintenance, scalability, and reusability of test components, making it an invaluable asset for any rigorous testing process.
Example
Test Harness
The Test Harness serves as the root level in our testing hierarchy, orchestrating the execution of multiple test suites and, if necessary, other test harnesses. This allows for a scalable and flexible approach to testing diverse components of our application.
<TestHarness>
    <Name>Main Application Test Harness</Name>
    <TestSuiteFiles>
        <TestSuiteFile path="path/to/ui_tests.suite" />
        <TestSuiteFile path="path/to/api_tests.suite" />
        <!-- Additional Test Suite files can be added here -->
    </TestSuiteFiles>
    <TestHarnessFiles>
        <!-- If this Test Harness needs to run other Test Harnesses -->
        <TestHarnessFile path="path/to/another_harness.harness" />
        <!-- Additional Test Harness files can be added here -->
    </TestHarnessFiles>
</TestHarness>- <Name>: Identifies the test harness, providing context for the scope of tests it manages.
- <TestSuiteFiles>: Lists the test suite XML files included in this harness, each targeting different testing scenarios or application modules.
- <TestHarnessFiles>: (Optional) Includes references to other test harnesses, facilitating nested or hierarchical testing structures.
Test Suite
Test Suites are collections of Test Scripts that target specific features or functionalities within the application. They are designed to group related tests for efficient execution and management. This version simplified the design and push the ID, dependencies to the scripts.
<TestSuite>
    <Name>UI Test Suite</Name>
    <AppName>com.example.myapp</AppName>
    <Description>User Interface functionality tests for the application</Description>
    <TestScripts>
        <TestScript prefix="LP">
            <Path>tests/ui/login_page_tests.py</Path>
        </TestScript>
        <TestScript prefix="SM">
            <Path>tests/ui/message_sending_tests.py</Path>
        </TestScript>
        <!-- Additional TestScript entries as needed -->
    </TestScripts>
</TestSuite>- <TestSuite>: The root element that defines the test suite. It encapsulates all the information and test scripts related to a specific suite.
- <Name>: Provides a name for the test suite. In this example, "UI Test Suite" indicates that this suite contains tests related to the User Interface of the application.
- <AppName>: This element specifies the application package name that the test suite targets. For example, com.example.myapp indicates the unique package name of the application under test.
- <Description>: Offers a brief description of the test suite's purpose or coverage. It provides context for what the suite is intended to test, which is particularly useful for documentation and quick overviews.
- <TestScripts>: This element contains a collection of <Script> elements. Each Script defines an individual test script that is part of the suite.
- <TestScript>: This element defines the path to the test script, each test script has multiple test cases with a unique prefix within the appName (other app can use the same prefix). The scripts define its own integer ID. A test case is identified by “<Prefix>:<ID>”.
Test Execution Configuration (TEC)
This component outlines the dynamic aspects of test execution, such as start times, device specifications, iteration counts, and specific tests to be run. This allows for flexible test execution tailored to various scenarios and requirements.
<TestExecutionConfiguration>
    <Target>
        <Type>Harness</Type>
        <FilePath>path/to/mainApplicationTestHarness.harness</FilePath>
    </Target>
    <LogConfiguration>
        <ReportLogPath>report.log</ReportLogPath>
        <ExecutionLogPath>test.log</ExecutionLogPath>
    </LogConfiguration>
    <StartTime>2024-04-10T08:00:00</StartTime>
    <Devices>
        <Device name="Pixel 4"/>
        <Device androidVersion="10" count="10"/>
        <Device name="Galaxy S20"/>
        <Device groupName="group1"/>
        <Device androidVersion="14" count="10"/>
        <Device groupName="group2" androidVersion="14"/>
        <Device groupName="group2"/>
    </Devices>
    <Iterations>5</Iterations>
    <TestRun>
        <Include>LP:1</Include>  <!-- Test ID 1 from Login Page tests -->
        <Include>LP:2-4</Include>  <!-- Test IDs 2 to 4 from Login Page tests -->
        <Include>SM:10</Include>  <!-- Test ID 10 from Send Message tests -->
    </TestRun>
</TestExecutionConfiguration>- <Target>: This new element encapsulates the details about the test collection (either a Test Harness or a Test Suite) that the execution configuration is intended for.
- <Type>: Specifies whether the target is a Test Harness or a Test Suite. This helps the test execution engine determine how to apply the configuration.
- <FilePath>: Provides the relative or absolute path to the Test Harness or Test Suite XML file. This direct reference ensures that the execution configuration is applied to the intended test collection without ambiguity.
- <LogConfiguration>: Specifies the log file name and storage location. If not specified, the log will default to the directory of the current test execution configuration file.
- <ReportLogPath>: Specifies the report log (log of test run results) file name and storage location.
- <ExecutionLogPath>: Specifies the execution log (user-defined log in the test script) file name and storage location.
- <StartTime>: Specifies when the test execution should commence.
- <Devices>: Lists the devices or environments where the tests will be conducted, defined by name and other relevant attributes. The devices will include device object in <Devices> list by order of appearance, "device" will always include first device in devices:
- Device name (other options will be ignored), if multiple device name is matched, pick the first one.
- "groupName" group name setup in MDCC.
- “count” to include number of devices.
- "androidVersion" to include android version number.
- "groupName" and "count" cannot co-exist.
- If just <Device></>, it will just return any one device.
- <Iterations>: Determines how many times the tests should be repeated, useful for stress or reliability testing.
- <TestRun>: Identifies specific tests or test ranges to be executed, allowing for selective testing based on current needs. This can take different forms:
- TestRun is not defined, the entire test harness will run.
- <Include><prefix></Include> all tests within that prefix can run. Multiple prefixes are fine.
- <Include><prefix><IDs></Include> ID can include ranges LP:2-4 will run LP-2, LP-3, LP-4.
TEC is executable, once it is done, 2 files will be created for TEC run: result files in JSON and log file. The framework will run “report generator” to parse the result and log files and process the data. Test framework bundle very primitive report generator, users are free to use their own report generator of their choice.
Instances in Total Control
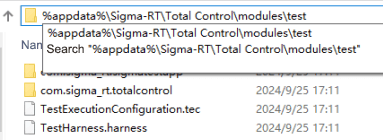
Total Control provides a complete example of App automation testing. After installing Total Control, you can find it in the following directory: %appdata%\Sigma-RT\Total Control\modules\test
Run Automated Tests
Run Through the Command Line
Open Total Control - Script - Terminal, and enter the following commands in the terminal to run the script
addToClasspath('C:/Users/admin/AppData/Roaming/Sigma-RT/Total Control/modules/test'); //Set the path to the directory where your automation test scripts are located
runTest("TestExecutionConfiguration.tec") //Run the test execution configuration file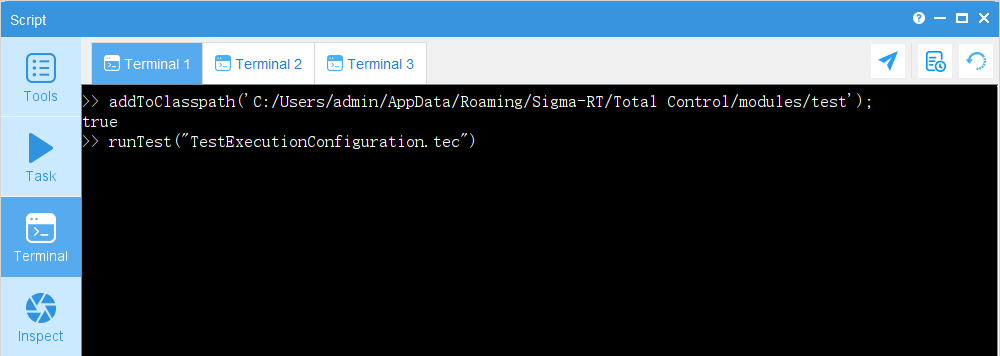
Run Through the User Interface
Through the user interface, you can easily generate and run test execution configuration files (*.tec) or edit saved *.tec files.
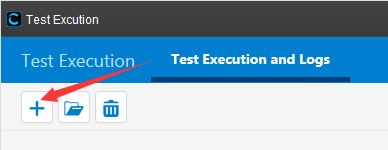
In the script window of Total Control, click "Test Execution" to open the test execution window.

Click the “+” button to create a new test execution configuration file.
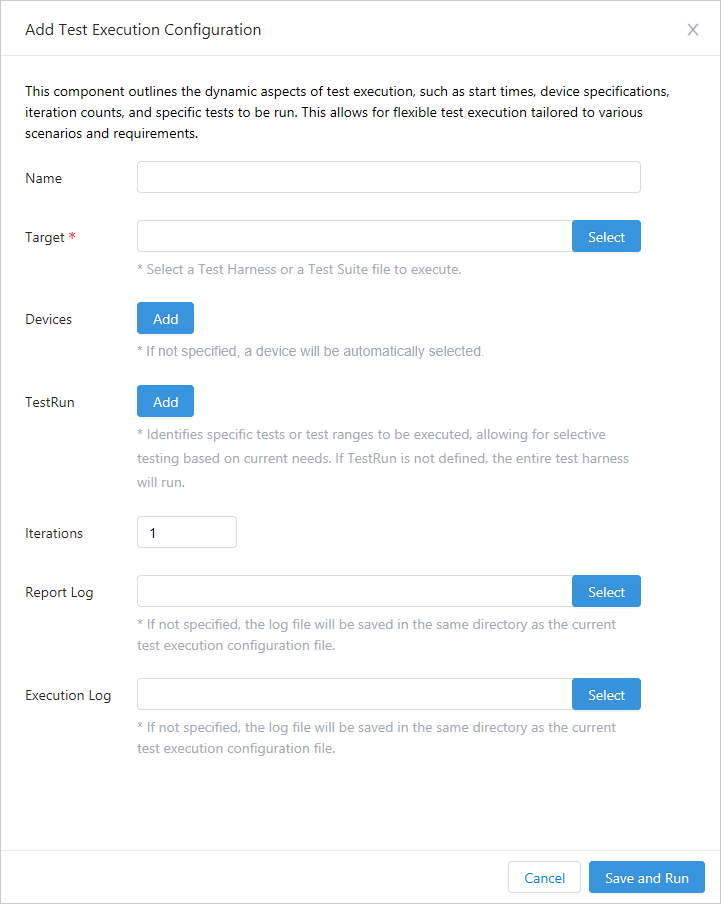
- Name: You can define a name for this execution, optional.
- Target: Select the test harness or test suite file to execute.
- Devices: Select the device to run the test. If not defined, a device will be selected at random.
- Test Run: Identify the specific test or test scope to execute based on current needs. If TestRun is not defined, the entire test harness will run.
- Iterations: The default is 1, but multiple iterations can be defined.
- Report Log: The log of the test execution results, where the log storage location can be specified. If not specified, it will be saved in the directory of the current test execution configuration file.
- Execution Log: Custom logs defined by the user in the test script, where the log storage location can be specified. If not specified, it will be saved in the directory of the current test execution configuration file.
Once created, click "Save and Run," specify the file name and location, and start the test. (You can also open an already saved test execution configuration file with the “.tec” extension, click "Save and Run," and start the test.)
You will see a new record added to the list.

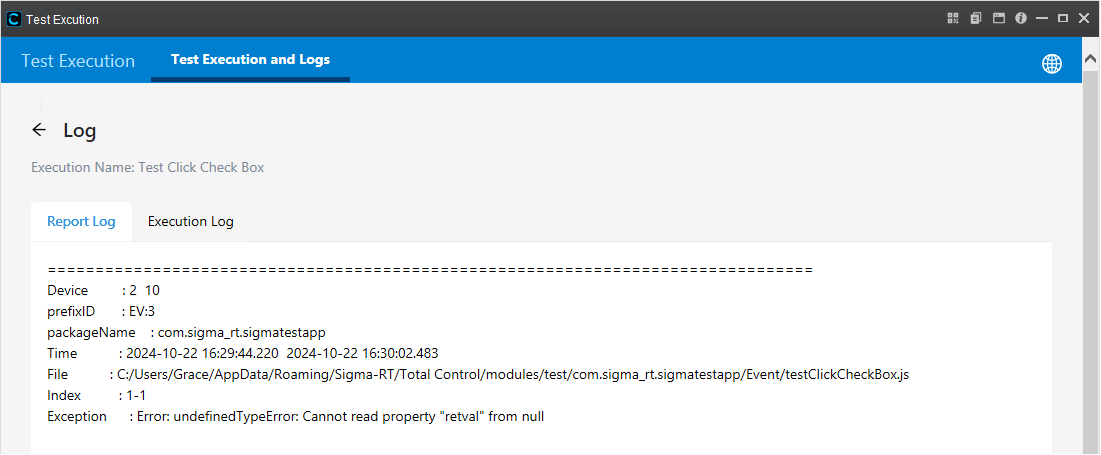
Click the log icon next to the record to view the report log and execution log.
